Yes, you can waterproof basement walls from inside, and for most homes it works well. The key is matching the fix to the water. Sealers and waterproof paint handle damp walls. Interior drain tile and a sump pump handle water that pushes in under pressure. At Buckeye Basement Solutions, we see both problems in Central Ohio basements all the time. Using the wrong fix is one of the top reasons a “waterproofed” basement is still wet.
This guide covers how water gets in, how to test your walls, the six main interior methods, how they compare to exterior work, and when to call a pro.
How Does Water Get Through Basement Walls?
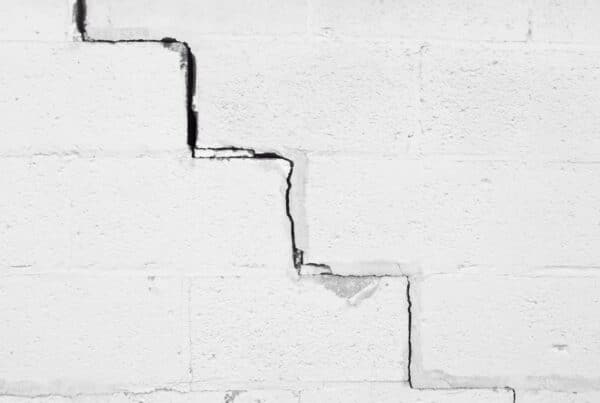
Water gets through basement walls in two main ways. It soaks through the concrete, or wet soil pushes it through cracks and joints.
Concrete and block look solid, but they’re porous. Water moves through tiny pores the same way a paper towel pulls up a spill. This is called capillary action, and it’s why walls can feel damp even with no visible crack.
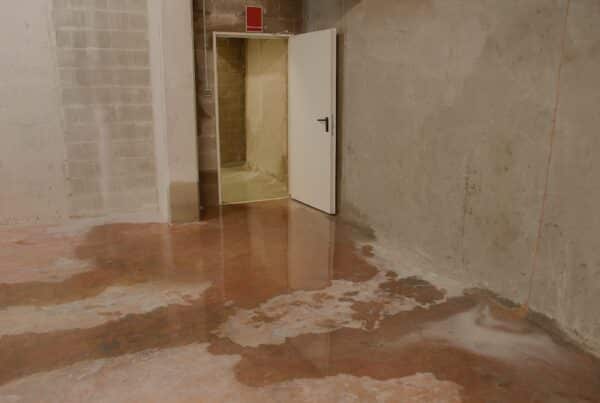
The bigger problem is hydrostatic pressure. After heavy rain or snowmelt, the soil around your foundation fills with water. That water is heavy, and it presses against your walls and floor. It finds any weak spot, such as:
- Cracks in poured concrete walls
- The cove joint, where the wall meets the floor
- Mortar joints and hollow cores in block walls
- Gaps around pipes and utility lines
- Window wells that fill up and leak at the seams
Some basement moisture starts inside the house. Warm, humid summer air hits a cool concrete wall and forms droplets. That’s condensation, and no wall coating will fix it.
Central Ohio homes deal with all three. Wet springs soak the soil, freeze-thaw cycles open small cracks a little more each winter, and humid summers add condensation.
For a closer look at leaks through the wall itself, read our guide on how to fix water seeping through basement walls.
How Can You Tell What Kind of Moisture You Have?
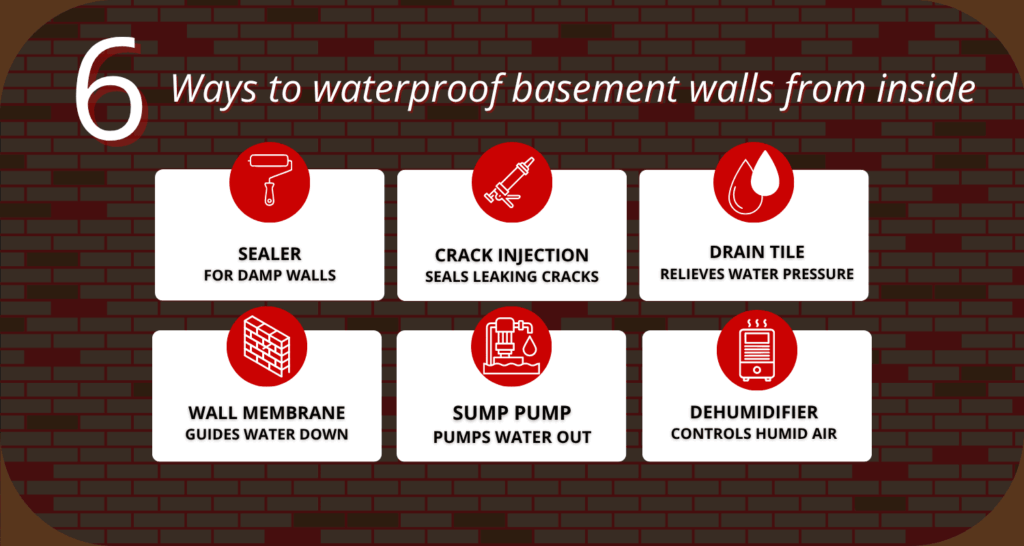
The easiest way to find out is the foil test. It shows whether water is coming through the wall or forming on its surface.
1. Pick a damp spot on the wall and dry it with a fan or hair dryer.
2. Tape a 12-inch square of aluminum foil to the wall. Seal all four edges.
3. Wait 24 to 48 hours.
4. Peel off the foil and check both sides.
If the side touching the wall is wet, water is moving through the concrete. If the room side is wet, you have condensation. That means humidity is the problem, and a basement dehumidifier system is a better fit than a coating.
Other signs your walls need attention:
- White, chalky efflorescence on concrete near the base of the wall
- Peeling or bubbling paint
- Damp spots that grow after it rains
- A musty smell or visible mold
- Water on the floor along the wall line
- Rust on water heater legs, furnace bases, or metal shelves
Humidity matters even when the walls are sound. The EPA recommends keeping indoor humidity below 60 percent, and ideally between 30 and 50 percent, to limit mold growth.
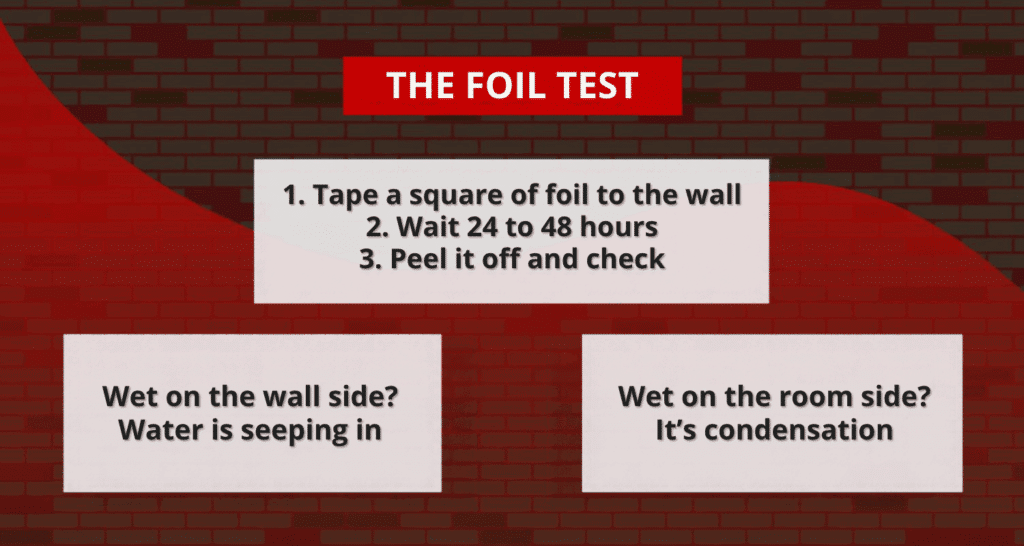
6 Ways to Waterproof Basement Walls From Inside
Interior waterproofing uses six main tools. Most dry basements use two or three of them together.
1. Waterproof Masonry Paint and Sealers
Waterproof paint and penetrating sealers are the simplest interior fix. They work best on walls that feel damp or show light seepage, because they slow the water that wicks through concrete.
They are not built to stop water under pressure. When the soil outside is soaked, pressure can push water behind the coating until it blisters and peels.
For the best results:
- Apply only to bare masonry. Remove old paint first.
- Clean off efflorescence, dirt, and mold.
- Patch cracks and holes before coating.
- Apply two thick coats, and let the first dry fully.
Paint is the cheapest option. Think of it as a moisture reducer, not a full waterproofing system.
2. Crack Injection
Crack injection seals leaking cracks in poured concrete walls from the inside. A technician injects polyurethane foam or epoxy into the crack, and it fills the gap through the full thickness of the wall.
Polyurethane expands and stays flexible, so it’s a common choice for stopping leaks. Epoxy cures hard and is used when the crack also needs a structural bond.
Injection doesn’t work well on block walls. It also won’t help if cracks keep widening or the wall is bowing. Those are signs of foundation movement that need foundation repair first.
3. Interior Drain Tile (Interior French Drain)
Interior drain tile is the most reliable way to waterproof from inside. It relieves hydrostatic pressure instead of fighting it. The system catches water where it enters, at the wall and under the floor, and carries it away before it reaches your living space.
Here’s how a typical install works:
- The crew removes a strip of concrete floor along the walls.
- They dig a trench beside the footing.
- Perforated pipe goes into the trench on a bed of washed stone.
- On block walls, small weep holes let trapped water drain out of the hollow cores.
- The pipe slopes to a sump pit.
- New concrete is poured over the trench.
Want to compare options? See our post on sump pump vs. French drain inside the basement.
4. Wall Membranes and Drainage Panels
A dimpled plastic membrane on the wall guides any water that gets through down into the drain tile. It also covers stains and gives unfinished walls a cleaner look. Membranes are a partner to drain tile, not a stand-alone fix.
Plain plastic sheeting stapled behind drywall is a different story. It can trap moisture against the wall and grow mold where you can’t see it. We don’t recommend it as a waterproofing method.
5. Sump Pump With Battery Backup
The sump pump is the engine of an interior system. Water from the drain tile flows into the sump pit, and the pump pushes it out and away from the house. Without a working pump, the drain tile just fills up.
A battery backup keeps the pump running when storms knock out the power, which is often when you need it most. Test your pump a few times a year by pouring a bucket of water into the pit. Learn the warning signs in our guide to spotting and fixing sump pump failure, or see our sump pump services.
6. Dehumidifier
A dehumidifier handles the moisture that walls and drains can’t reach: humid air. Even a basement with a perfect drain system can feel damp in July. A unit sized for the space keeps humidity in a healthy range and helps prevent mold and musty smells.
Interior vs. Exterior Waterproofing: Which Is Better?
Interior waterproofing is the better choice for most existing homes. It costs less, avoids digging around the house, and handles water under pressure when it includes a drain and pump. Exterior waterproofing stops water before it touches the wall, but it means digging down to the footing.
| Interior Waterproofing | Exterior Waterproofing | |
|---|---|---|
| Where the work happens | Inside the basement | Outside the foundation walls |
| Digging | Floor trench inside only | Excavation down to the footing |
| Landscaping, patios, driveways | Left alone | Often removed and replaced |
| Handles hydrostatic pressure | Yes, with drain tile and a sump pump | Yes, with a membrane and footing drain |
| Keeps water out of the wall itself | No, it manages water once it’s in | Yes |
| Relative cost | Lower | Higher |
| Best for | Existing homes, finished yards, leaks at the cove joint | New builds, damaged exterior walls, severe water |
Many homes do best with a mix: interior drain tile plus simple outdoor fixes like clean gutters, longer downspouts, and soil that slopes away from the house. For a broader look at both, read our guide to basement and crawl space waterproofing.
How to Seal Basement Walls From Inside for Minor Dampness
You can seal basement walls yourself if the foil test shows light moisture through the wall and you don’t see puddles or active leaks. Follow these steps:
- Fix the outside first. Clean the gutters, extend the downspouts well away from the foundation, and make sure the soil slopes away from the house.
- Let the wall dry fully. Run a fan or dehumidifier for a few days.
- Scrub the surface. Use a stiff wire brush to remove efflorescence, dirt, and loose material.
- Strip old paint. Sealer only bonds well to bare masonry.
- Patch cracks and holes. Hydraulic cement works well for small gaps.
- Apply the first coat. Brush it on thick and work it into the pores.
- Apply the second coat. Wait the full drying time on the label first.
- Check after the next heavy rain. Look for new damp spots or bubbling.
If water still comes through after sealing, the coating isn’t the right fix. That’s a sign of pressure behind the wall.
Common Interior Waterproofing Mistakes
These mistakes show up again and again in basements that were “already waterproofed”:
- Skipping the outside. Overflowing gutters and short downspouts dump water right against the foundation. Interior work can’t keep up with that.
- Painting over efflorescence. The coating won’t stick, and it peels within a season.
- Using paint on active leaks. Paint can’t hold back water under pressure.
- Stapling plastic to the walls. It traps moisture and hides mold.
- Finishing the basement too soon. Fix the water before you add drywall, carpet, or furniture.
- Forgetting the sump pump. A pump with no backup, or one that hasn’t been tested in years, is a flood waiting to happen.
- Ignoring structural signs. Bowing walls and horizontal cracks need repair before any waterproofing.
What Does Interior Waterproofing Cost?
The cost of interior waterproofing depends on the method, the size of the basement, and the wall type. Paint and sealers cost the least. Crack injection is usually priced per crack. Interior drain tile with a sump pump costs the most, because it involves removing and replacing concrete, but it’s also the longest-lasting interior fix.
Doing nothing costs more. FEMA’s FloodSmart program notes that just one inch of water can cause up to $25,000 in damage. Buckeye offers financing options and will beat any written competitor’s price.
Conclusion
Waterproofing basement walls from the inside is a practical solution for managing moisture and protecting your home’s value. The right system, installed by professionals, helps keep your basement dry and safe for years to come.
If you are seeing signs of water intrusion or want to get ahead of basement and foundation issues, Buckeye Basement Solutions can help you find the best approach for your home.
Related Questions to Explore
Can you waterproof a basement from the inside?
Yes. You can waterproof a basement from the inside using sealers, crack injection, interior drain tile, wall membranes, and a sump pump. For water under pressure, drain tile and a sump pump are the parts that matter most. Our basement waterproofing services combine these based on what your inspection finds.
Is it better to waterproof a basement from the inside or outside?
For most existing homes, inside is better. It costs less, needs no excavation, and handles hydrostatic pressure with drain tile and a sump pump. Outside waterproofing makes the most sense for new construction or walls with exterior damage.
Does waterproof paint work on basement walls?
Waterproof paint works on basement walls with light dampness. It slows water that wicks through the concrete. It does not stop leaks from cracks or water pushed in by wet soil, and it can peel when pressure builds behind it.
Is waterproofing basement walls from inside enough?
It’s enough for most homes when it includes a drainage system. A coating alone usually isn’t enough. Interior drain tile and a sump pump relieve the pressure behind the wall, which is the root cause of most basement leaks.
Do you need a sump pump for interior waterproofing?
You need a sump pump if you install interior drain tile. The drain collects the water, and the pump removes it from the house. Paint or crack injection alone don’t need a pump.
How do I know if basement moisture is condensation or seepage?
Tape a square of foil to the wall for 24 to 48 hours. Moisture on the wall side means seepage. Moisture on the room side means condensation, which a dehumidifier fixes better than a coating.
When to Call a Professional
Call a professional when water keeps coming back or the wall itself is changing. A coating can handle light dampness. Anything more needs a real diagnosis.
Get an inspection if you notice:
- Water on the floor after most rains or during snowmelt
- Cracks that are widening, horizontal, or leaking
- Walls that bow, lean, or bulge inward
- A coating that bubbled or peeled within a year
- Musty smells or mold that keep coming back
- You plan to finish the basement, or you’re buying or selling a home
Many of these are also common signs of water intrusion elsewhere in the house, so it pays to check early.
A Buckeye basement inspection looks at where water enters, how your walls are built, and what’s happening outside. Our inspection specialists, including Senior Inspection Specialist Jay Ray, came up through our install crews, so they know what each system takes to build. You’ll get an honest recommendation, even if the answer is a simple fix you can do yourself. We serve homeowners across Columbus and Central Ohio. Call (614) 956-4592 to schedule.
Conclusion
Waterproofing basement walls from inside works when the fix matches the water.
- Damp walls: seal them, and control humidity with a dehumidifier.
- Leaks and pressure: add interior drain tile and a sump pump with battery backup.
- Moving walls: repair the structure first, then waterproof.
Not sure which one you’re dealing with? Our team can find the source and recommend the right basement waterproofing solution for your home. Schedule your free estimate today.